

You will receive an email from ActivityHero prompting you to complete the connection process. Simply click Start Connecting in the email to begin.
Verify

To receive a verification code, click Send Verification Code. Check your email for the code, then enter it in the window that appears and click Verify.
Enter Info
Use the provided information to upload your CSV files and connect your SIS. Enter the details in the appropriate fields, then click Save & Done to complete the setup.
Secure File Transfer Protocol (SFTP)
SFTP connections are utilized by ActivityHero to receive additional data needed for augmenting and enriching existing records beyond the core sync.

Use SFTP to securely upload CSV files from your SIS. You will receive the necessary credentials:
- Host
- Port
- Username
- Password
- Authentication Type
These credentials ensure secure transfer of sensitive data to ActivityHero. The uploaded data can supplement or replace data transferred via the API.
Note: Only Aeries Administrators can complete the following steps.
1. Access the Configuration Page
Navigate to:
School Info > Imports and Exports → OneRoster v1.1 Configuration
2. SFTP Vendor Setup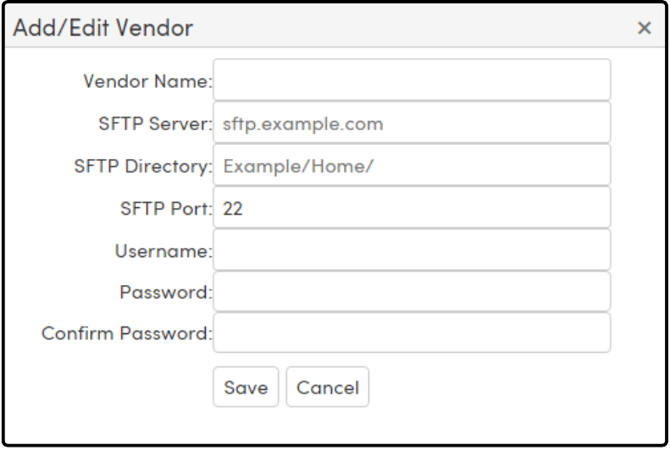
To configure CSV extract delivery via SFTP:
- Click Add Vendor.
- Fill in the required fields using the information provided:
- Vendor Name
- SFTP Server / Host
- SFTP Port
- Username
- Password / Confirm Password
- Click Save to complete the setup.
Note: All SFTP credentials should be found in the provided CSV SFTP upload section.
3. Select Extract Files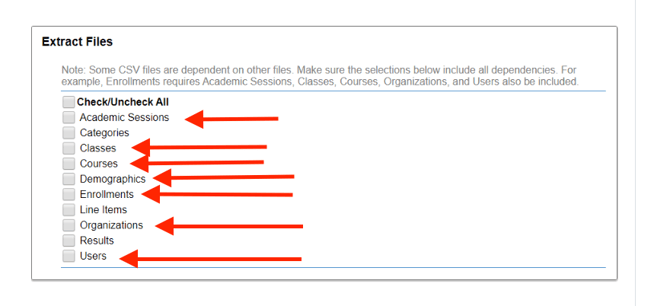
Choose which CSV files to include in the extract. Recommended Files are:
- Academic Sessions
- Classes
- Courses
- Demographics (optional)
- Enrollments
- Organizations
- Users
4. Schedule the Extract Process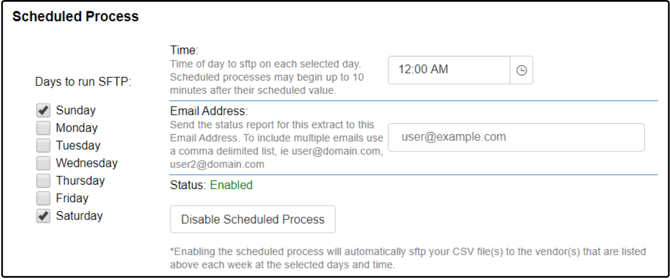
Configure these settings:
- Days to Run SFTP: Select days of the week
- Time: Set time of day
- Email Address: Confirmation email(s), comma-separated
- Scheduled Process Button: Enable or disable automation
5. Additional Options
Custom field mappings for OneRoster:
- User.sourcedId: Usually Student ID / Staff ID (recommended to leave default)
- User.username: Choose a field to populate usernames
- User.userIds: Define a custom ID and select the source field
- Academic Session School Year:
- By default, school year is based on school calendar
- Check Use Current Database Year to unify across schools
- Break Up Elementary Classes by Grade Level:
- Enabled: Creates separate sections per grade (e.g., 100_1, 100_2)
- Disabled: Single section number for both grades (e.g., 100_1)
Click Save after configuration.
6. Run Extract
Always click Save before running!
- Run Now and Email: Sends a test extract to your inbox
- Run Now and Upload: Sends the zip file to vendors via SFTP
Large files (like results.csv) will be emailed as a link, not as an attachment
7. Enable Scheduled Upload
Once ready for automation:
- Click Enable Scheduled Process
- Click Save
API Configuration
ActivityHero uses API connections for synchronization, ensuring real-time, seamless integration of essential data between systems.

Connect your SIS (such as Aeries or PowerSchool) using an API integration. You’ll be asked to provide:
- API Endpoint
- Optional API Endpoint Base URL
- OAuth2 Client ID
- OAuth2 Client Secret
Once configured, your SIS will seamlessly sync data with ActivityHero.
To connect Aeries with ActivityHero using the OneRoster API, follow these steps to securely generate and share the necessary credentials.
Step 1: Create a Vendor in Aeries
In Aeries, navigate to:
Security > API Security
- Click Add New Record to create a new vendor.
- In the Product Name field, enter the vendor name ((e.g., "ActivityHero")required).
- For OneRoster API access, select "OneRoster" in the Type dropdown.
- Click Save, then select the new vendor from the list.
Step 2: Enable OneRoster API Access
- On the API Security page, click Change at the top.
- Ensure the OneRoster check box is checked to enable the vendor to access the OneRoster API.
- Click Update to save.
- Then check the box for Display Consumer ID & Secret Keys for OneRoster.
Step 3: Share OneRoster Credentials with ActivityHero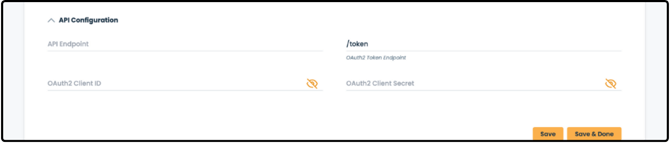
After enabling OneRoster API access, Aeries will generate the credentials your vendor (ActivityHero) needs for secure API communication:
- API Endpoint / Aeries URL: The base URL of your Aeries site (e.g., https://demo.aeries.net/aeries/)
- Make sure this is publicly accessible and uses HTTPS.
- If unsure, you can copy it from your Aeries login page (up to /aeries/).
- OAuth2 Client ID / Consumer ID: Required for OAuth 2.0 authentication. This is a unique ID. Enter it
- OAuth2 Client Secret / Consumer Secret Key: Also required for OAuth 2.0. This is a secure, unique secret key.
Important:
Do not share these credentials with anyone other than ActivityHero. If the credentials are ever compromised, delete and recreate the vendor record.
Required Permissions

For the OneRoster API to work properly, make sure the vendor has access to these areas in Aeries:
- Student Data
- Schools
- Terms
- Teacher Data
- Master Schedule
- Course Data
- Classes
Step 4: Enable OneRoster Settings
- Go to School Info > School Options (you must be at the District level).
- Click Edit/Change, then check the Enable box under OneRoster Settings.
- Click OK when the warning message appears.
💡 Important: These changes won’t take effect until your Aeries application is restarted in IIS. We recommend doing this after hours to avoid disrupting users.
Step 5: Complete the OneRoster Configuration
Fill out the following fields:
- Public URL: Enter the same Aeries URL from Step 3 (make sure the capitalization matches exactly).
- Signing Certificate: Click the magnifying glass and choose your valid SSL certificate.
Aeries Hosted customers should contact Aeries Support for help confirming the right certificate and restarting the system.