How do I create On-Demand Activities and Content?
As of November 3, 2020, you can build and preview your On-Demand Activities through the Provider Dashboard
Step 1: In your Activity Manager select + Add an Activity
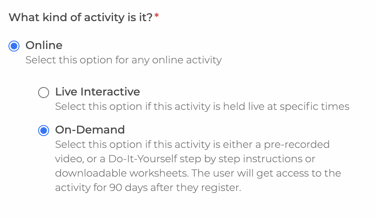
Step 2: Under Activity Type select > On-Demand

Step 3: Fill out the rest of the activity form fields.
- Add the appropriate age range, grade for your activity
- Under Activity Description: Write a short summary or preview of your activity. We recommend 2-3 sentences. This description is shared publicly prior to registration or payment. Do not add URLs, links or contact information.
Step 4: In the Photos tab, upload activity photos you would like customers to see prior to registration
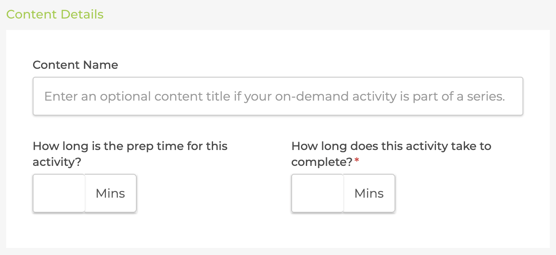
Step 5: Continue to the Content tab to build your On-Demand Content, beginning with Content Details:

- You can add an optional Content Name, which is the same as a Session name
- Enter the approximate duration of your activity. It is also helpful for parents to also understand how long it takes to prepare for this activity.
Step 6: Add your pre-recorded Video, Printables, Items Needed, and step-by-step Instructions. The more sections you fill out, the better the On-Demand experience will be for activity partipants. Alternatively, you can choose to use only one or a combination of these sections.
Step 7: Choose when to Begin Accepting Registrations. If you select immediately, your activity will be available for purchase once it has been approved by our content moderation team. If you select a specific time & date, your On-Demand Activity will enter our moderation queue before it's scheduled publish date.
Step 8: Choose your Price. You can add more pricing options here if necessary.
Step 9: Add Additional Fees, Discounts, and or Payment Plans if necessary.
Step 10: Select Save & Preview to view your On-Demand Activity the same way a customer would see it after registration.
More Articles about ActivityHero On-Demand:
